
There are tons of people who desire to start their own blog but just don’t know how to go about it. They might google it, and the results will return one of these all-in-one services like Wix or Squarespace. They’ll require them to spend days building their website with a drag-and-drop builder, and then charge hundreds of dollars every year to keep it up and running. Instead of going down that rabbit hole, I’m going to walk through how you can set up a website like the pros do. This way will be cheaper and quicker than the all-in-one sites, will allow you to own and have control over all of your content, and be set up for monetary success in the future.
Before we begin, please note that I am performing these steps on a Microsoft computer running Windows 10. While this method might be possible on Apple or Google computers, the steps will not be geared towards those software’s.
We have 3 basic steps:
- Building the site
- Publishing it live to the internet.
- Backing up our site on our own computer
Step 1: Building the Website
We have two sub-steps in this first goal of building the website:
- Step 1A: Download needed software.
- Step 1B: Create the website.
Step 1A: Download needed software.
We’re going to build the website with the WordPress software from WordPress.org. Note that this is not the same as WordPress.com. The .com is an all-in-one provider just like Wix or Squarespace. The difference with .org is that we are going to be downloading and installing the WordPress software directly to our own computer completely free of charge, which will allow us to build, control, and own all of our content.
You can download WordPress at wordpress.org/download. Make sure to write down the username and password that you create for WordPress.org, as you will need this later on.
Next, we’ll need to download and install LocalWP, which will serve as a user interface from our computer to the WordPress software. We will use this interface to create and remove sites and access sites that are living in our computer file system. The first 3 minute and 18 seconds of this video walk through how to set it up:
Step 1B: Creating the WordPress Site
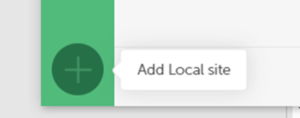
Once we have downloaded and installed those two pieces of software, we will be able to create a WordPress site. Open LocalWP and select “Add Local Site” in the bottom left corner.
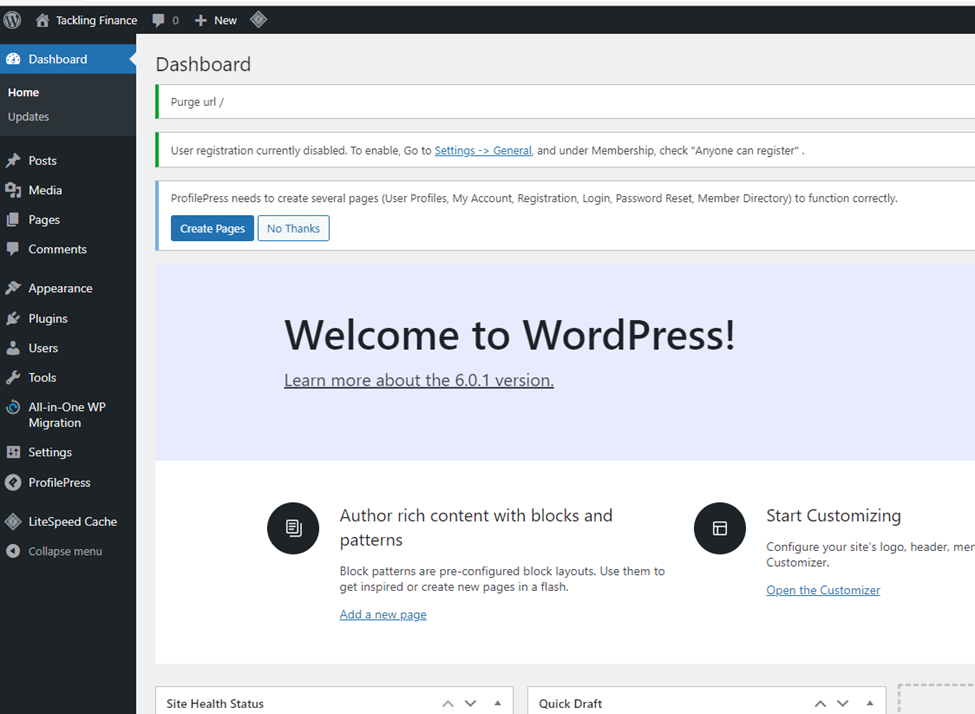
Navigate through the various setup screens. You’ll need your WordPress username, email, and password. When you have successfully setup a WordPress site, you should see the WordPress Dashboard (pictured below)
At this point, you can begin writing content by going to the posts tab. If you just want to start writing content and worry about setup later, you can do it. The site files and all content will be stored in a file folder on your C Drive titled “Local Sites”.
When we are ready to build out our website visually, you can build it yourself from scratch, have someone else build it for you and import it, or a hybrid of both. I purchased a theme titled “BlogInWP” from BlazeThemes, which provides an easy way to create and customize the website. You can find a link to it below. Upon purchase, they will send an email with instructions on how to download and install.
They also offer a free version, and you can build a fairly good-looking site with it, albeit with limited functionality. To find the free version, do the following:
- Hover over appearances and select themes.
- Select the “Add New” button at the bottom of the screen.
- Search “BlogInWP”. It should appear in the search results.
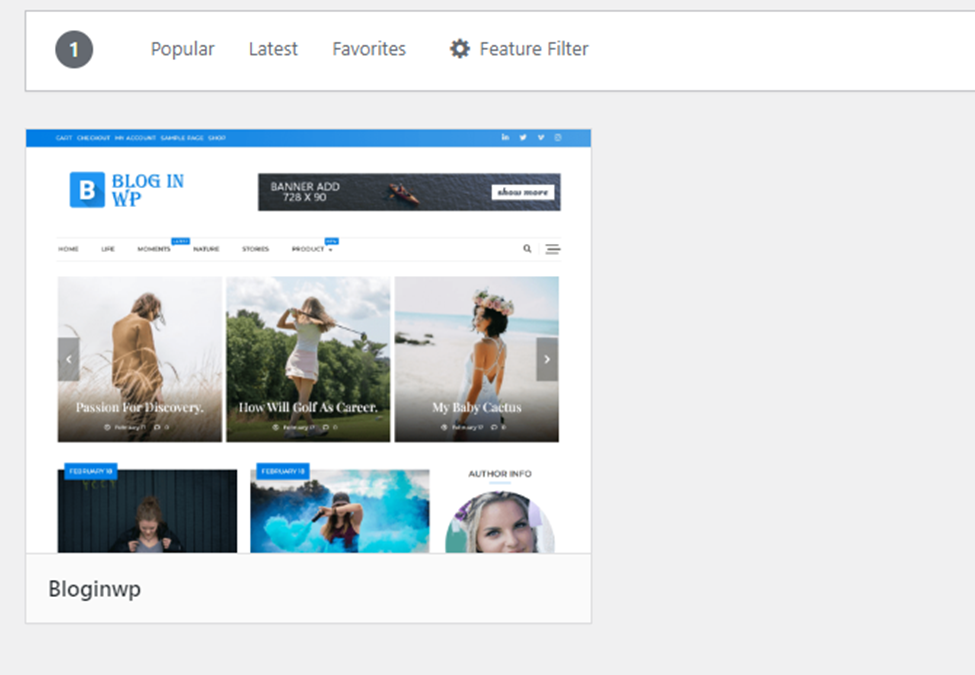
Hover over the website preview that is pictured above. A button will pop up that says “Install”. Click to install, and then click “Activate” when finished.
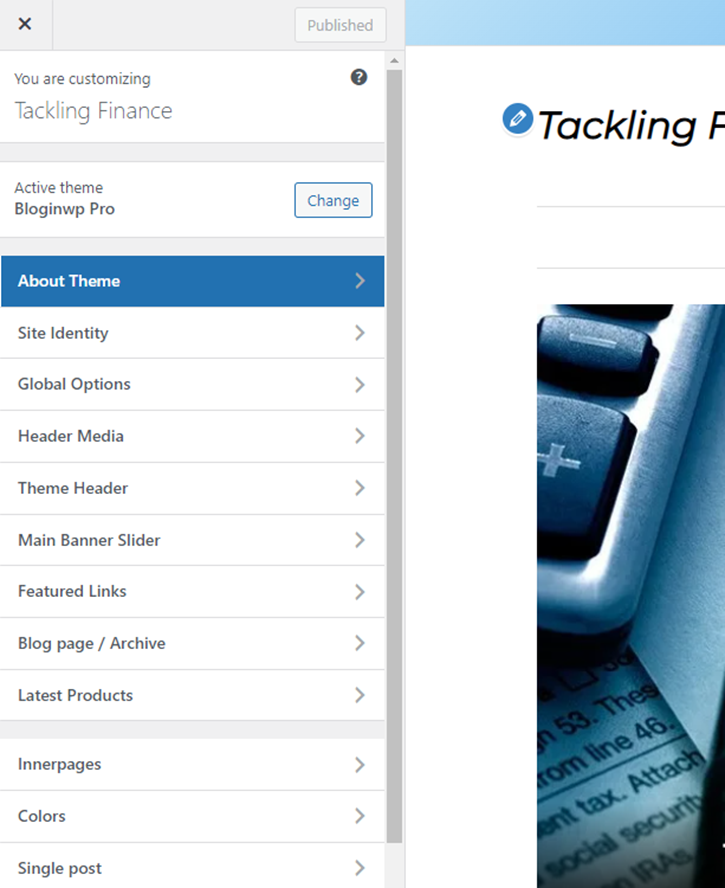
From the WordPress dashboard, hover over “Appearances” and select “Customize”. It should take you to the website editor screen (pictured below).
You can now build out the visual look of your website. When you are ready to save, click “Publish”. All of these tabs can be a bit confusing and take some time to figure out where everything is at. To help, I have another post that walks through it all (coming soon).
Step 2: Publishing Live to the Internet
We have four sub-steps in our second step. Those are:
- Step 2A: Renting the domain name (a.k.a. the website address)
- Step 2B: Finding a host (a host will connect you to the internet).
- Step 2C: Connecting the domain to the host.
- Step 2D: Moving Your WordPress Site from Your Computer to Hostinger.
Step 2A: Renting the Domain Name
You might see the term “buy” used for website addresses, but a more apt term is “rent”, as you will have to renew your website address every year. I use google domains for renting my web addresses. They currently charge $12 per year, and you can set it to auto-renew every year. They also offer privacy protection on certain domain endings, which is important to avoid having your information published online. However, I have noticed that even with privacy protection, I receive light spam, so I recommend using a secondary phone and/or email address that you don’t mind possibly getting spam in.
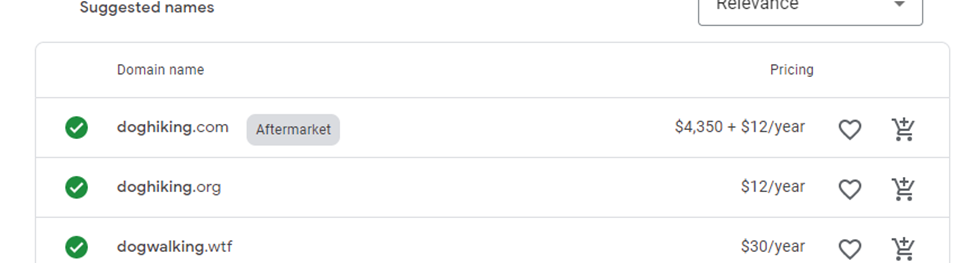
Another thing to note about domain names: there is a secondary market for these. Individuals and businesses will buy domain names they think are likely to have demand now or sometime in the future. This can be popular words and phrases. It can also be businesses that have not renewed the domain name they previously used. These resellers will place a one-time fee on the website to obtain it. These fees can be in the thousands of dollars. When you search on Google Domains, it will show you whether it has a fee on it or not. An example is shown below:
When you find a domain that you want, add it to your cart and checkout. Google will register your domain with the information you provide, but they do not connect it to the internet. There are providers that will do both, but I do not recommend registering your domain on your host as it will restrict your ability to switch hosts down the line. My research has found that Google has the lowest prices, is easy to use, and is a trusted name.
Step 2B: Finding a host
There are tons of hosts out there. They will charge you on a per-month or per-year basis. Many use teaser rates for the first year. There are tons of different aspects to consider in a host, including:
- How many websites they’ll allow you to host.
- Do they provide an SSL for each website.
- Uptime rates.
- Customer service.
- If the website is large, how much storage they provide and traffic bandwidth they allow.
- Price (including teaser rate transparency).
I do not recommend obtaining the domain, email, or building the website through your host, as this will restrict your ability to leave the host down the road if you desire to switch at some point.
I chose Hostinger.com and their WordPress Starter Plan because they checked all the boxes for me and have a 30-day money back guarantee. The first-year cost is currently $3.99 per month and they are transparent that it will increase to $5.99 per month after the first year. I have been happy with their service to date. You can find a link to the plan below:
https://www.hostinger.com/wordpress-hosting
Step 2C: Connecting the Domain to the Host
Once we have signed up for a host, we are ready to connect our website name to the host. We have 4 sub-sub-steps (don’t worry, there won’t be any sub-sub-sub-steps!) that we must do in order to connect the two. Those are as follows:
- Add the website domain to the host dashboard.
- Update the Domain Name Server (DNS) or Create a Custom Record
- Install the WordPress Plugin onto the website from the Hostinger dashboard.
- Install the SSL Certificate and Adjust Settings
Step 2C (1): Add the website domain to the host dashboard
Once you login to your account on Hostinger, click the “Hosting” tab at the top of the page. Then select “Add Website”. Enter your domain name and password. Then select “Add Website”.
Step 2C (2): Update the Domain Name Server (DNS) or Create a Custom Record
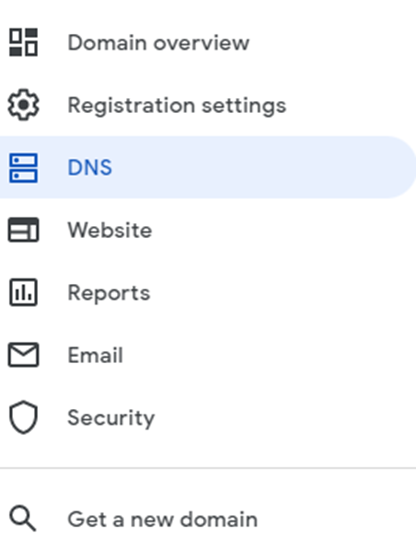
We now need to go back to our Google Domains account. Select the “My Domains” tab on the left side. Then click on the website you purchased. This should bring up new selection choices on the left panel. Click on DNS.
We have two options:
Option 1: Change the Domain Name Server to Hostinger’s servers. (This act is more broadly referred to as “Pointing your domain”)
We’ll do this by doing the following:
Select “Custom Name Servers” at the top of the screen. Then click on the bold text that says “Your domain is using custom name servers”. It should reveal two blank input fields.
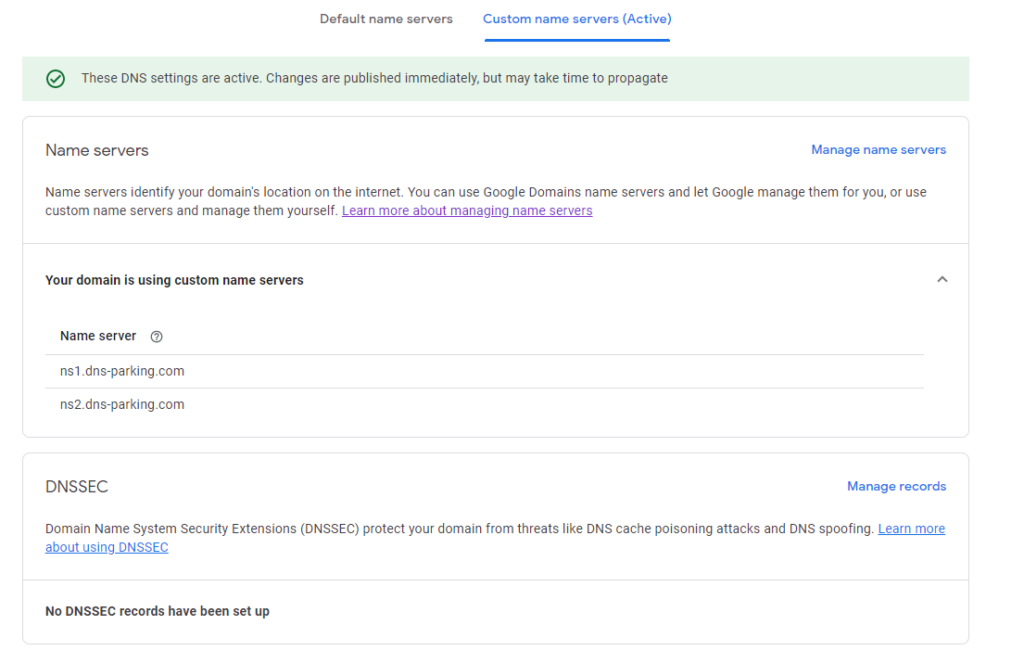
Next, go back to your Hostinger Dashboard. Make sure the correct website is chosen in the top left dropdown box. Then on the left side, copy the addresses under the Hostinger nameserver. Paste these addresses into the two inputs above.
This is the method recommended by Hostinger. They state “We recommend this method because it automatically sets your domain with our IP address so you don’t have to go through another hassle of changing it if our nameservers change one day.” This method will prevent us from activing Google Reports in our Google Domain account, so we will have to install a plugin on our Hostinger WordPress if we want to see Google Analytics.
Option 2: Create a Custom Record
Click on the DNS tab. Under the “Default name servers”, click “manage custom records”. See the article linked below for instructions on how these fields should be filled out. This method will allow us to see our Google Analytics, but is not recommended by Hostinger.
How to Point a Domain Name to Hostinger Using Hostinger Nameservers or A Record
Step 2C (3): Install the WordPress Plugin onto the website from the Hostinger dashboard.
Next, we need to head back to Hostinger and install the WordPress plug-in. Go to the Hostinger Dashboard and select “Auto Installer”. In the upper left corner, make sure the desired website is showing in the dropdown. Then hit “Select” on WordPress. A popup should appear. Do the following:
- Enter your desired website title
- Enter your WordPress.org username and password.
- Click the advanced dropdown
- Select https:// in the installation path dropdown (notice the s)
- If you desire to have the blog as secondary to a main website, enter your desired subdirectory name (example: mywebsite.com/blog). Otherwise, leave the subdirectory field blank.
- Click Next
- Make sure the language is correct.
- Hit Install
It should take you to a new screen that looks like this:
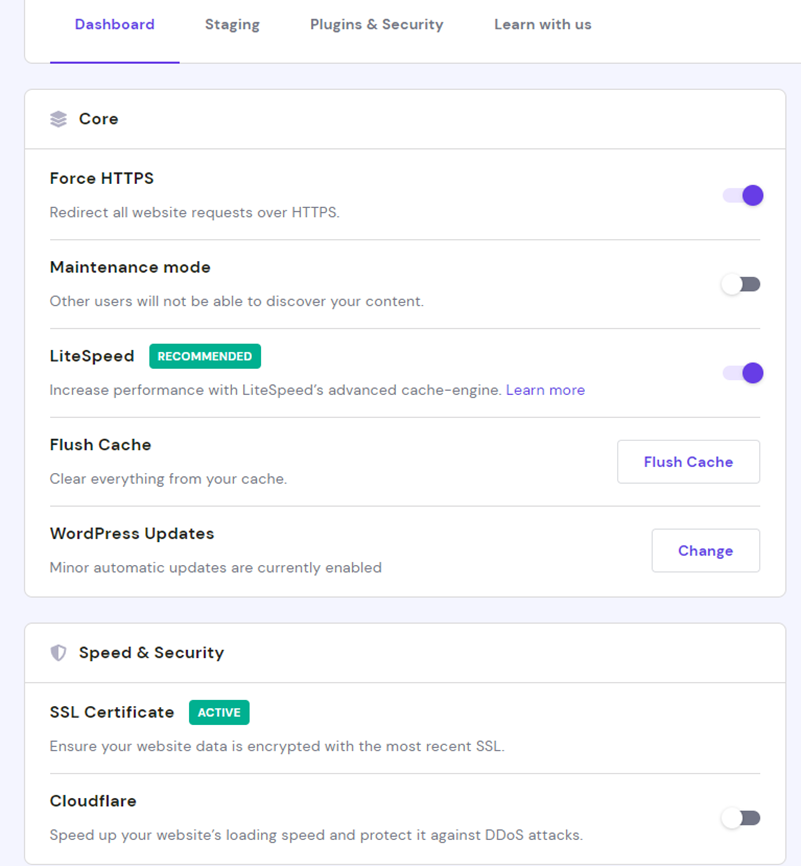
Step 2C (4): Install the SSL Certificate and Adjust Settings
From the screen shown above, we want to first install the SSL Certificate by selecting Install in the SSL Certificate row. It will show “Active” when installed. Next, we want to ensure “Force HTTPS” is turned on, and LightSpeed is also turned on.
There are additional Upsells on this screen, such as Cloudflare and Daily Backup. We are going to be backing up the website ourselves to our own computer, so a backup by the host is not required. For Cloudflare, my research is mixed about whether it is necessary or not. I have chosen not to add it since I do not anticipate receiving enough traffic at first to attract malicious actors, but it could be something to look into sometime down the line as your site grows.
Step 2D: Moving Your WordPress Site from Your Computer to Hostinger
If you have not built out your website yet, then this step is not required. However, if we have added anything to the WordPress site that lives in our computer, then we will have to do the following:
- Export our WordPress site installed on our computer to a .wpress file.
- Import the .wpress file into the WordPress Plug-In on Hostinger.
Here are the detailed steps on how to achieve that:
- Open LocalWP
- Click on the name of the website.
- Click “WP Admin”
- Login using your WP login credentials.
- Hove over “Plugins” and select “Add New”
- Search for “All In One WP Migration”
- Click “Install Now” and then “Activate”
- It should add a new button to the left panel. Hover over “All in one WP Migration” and select “Export”
- Select “Export To”, and then “File”. When it is finished compiling, click “Download”. This should download a .wpress file to your computer.
We’ve now Exported our WordPress site to a .wpress file. Now we must import this file to our WordPress plugin on Hostinger.
- From our Hostinger Dashboard, select “Dashboard” under the “WordPress” category.
- Then select “Edit Website”.
- All-In-One WP Migration should be already installed by default. However, repeat the same download steps if it is not.
- Hover over “All In One WP Migration” and select “Import”.
- Drag the .wpress file into the import or select “Import From File” and scroll to the .wpress file on your computer. The click “Proceed” and “Finish”
- Refresh the page and it should ask you to log back in again. Enter your credentials. You site should now be updated. You may not see it updated at first because you have to clear the cache. Scroll up to the diamond shape icon at the top of the screen and select “Purge All”.

A couple final import things to note. To refresh the page, you should always go up to the diamond at the top and select “Purge All”. Refreshing using CTRL+R or CTRL + F5 will not work in certain situations.
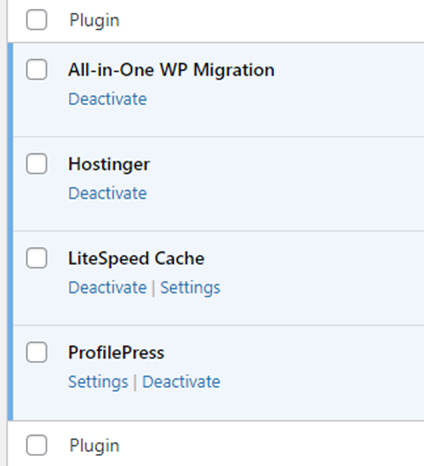
Hostinger’s WordPress Plugin will come with a number of plugins already installed. You do not necessarily need these. Below is a picture of the plug-ins that I have installed and active. You can delete a plug-in by hovering over “Plugins”, selecting “Installed Plugins”, and selecting “Deactivate”, then “Delete”.
Congrats! We’ve finished importing our site to Hostinger.
Step 3: Backing up our site on our own computer
To save a copy of our website onto our own computer, all we need to do is repeat steps 1-9 in Step 2D, but these steps should be performed inside of Hostinger’s WordPress plugin. To visually see it on our computer, we can repeat steps 10-15, but preform them inside the local website that we access by using LocalWP.
Note that importing a .wpress file will override any work previously done in the WordPress site. So if you use the backup copy to “try out” something that is not on your Hostinger WordPress, it will be overridden upon import.
If we export from Hostinger on a regularly scheduled interval, then we will have a backup copy of our website in our computer. So if we wake up one day and cannot access our website, we don’t have to worry about losing our entire content.
Conclusion
That’s it! There is a lot of content here, but the process is fairly easy once you’ve got it down pat. If you get stuck at any point and would like to hire me as a consultant, please reach out to me here. Give it a share if you think it could help someone else. You can also check out some of the other resources I provide at the links below.
My Accounting & Investment Services – https://www.mageetax.com/
My Toolbox – https://www.etsy.com/shop/AndrewsToolbox
Happy Blogging!